Overview
This project will showcase how Windows Server 2019 Active Directory can create and add users with PowerShell Automation.
**Special Thanks to Josh Madakor on YouTube for the tutorial.

Steps
- Setting up the Network
- Installing Guest Additions
- Identify and Configure the Network adapters
- Rename the PC
- Install Active Directory Domain Services
- Create Domain Admin account
- Install and configure RAS/NAT
- Install and configure a DHCP
- Download Powershell scripts from Github
- PowerShell script setup and explanation
- Change directory to script directory
- Run Script
- Install Windows 10
- Test a new user
Requirements:
- Oracle VirtualBox
- Windows Server 2019
- Windows 10
Download Requirements:
- https://www.virtualbox.org/wiki/Downloads
- https://www.microsoft.com/en-us/evalcenter/evaluate-windows-server-2019
- https://www.microsoft.com/en-us/evalcenter/evaluate-windows-10-enterprise
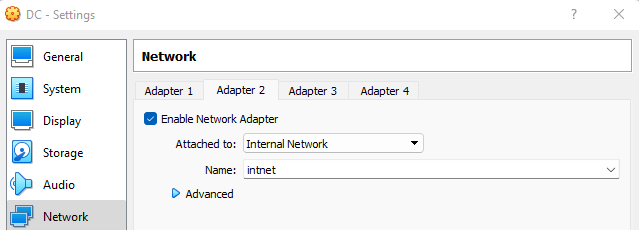
Setting up the Network
Before installing the server we need to create two adapters for the network. This can be configured in the Network settings in VirtualBox.
One for connecting to the internet.

The other for an internal network.
Installing Guest Additions
After the setup is done we need to Install VirtualBox Guest Additions to make the virtual machine run smoothly.
On the top of the tab click on Devices and then Install Guest Addition CD image. Then head File Explorer click on the This PC tab and click CD Drive (D:) VirtualBox Guest Additions.

Click on the amd64 application and install the program.

Identify and Configure the Network adapters
Head to the network options on the bottom right of the screen and click on Change adapter options.

Let’s identify which network connects to the internet and which is the internal network.
Right click on each network status and look at the details.
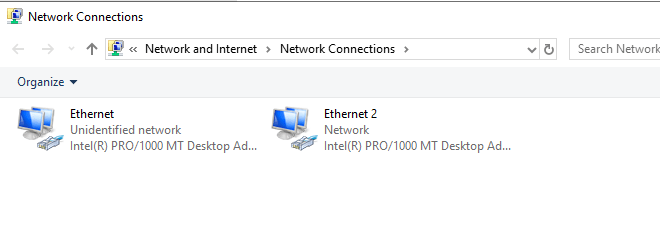
The IP address below connects to the internet.

And the one below is an internal network.

Let’s rename both networks to easily identify them.

Right click on the internal network and click on properties. Double click on IPv4 to assign an address.

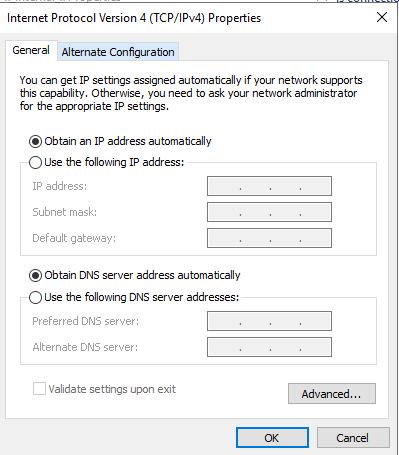
Input the following IP addresses.

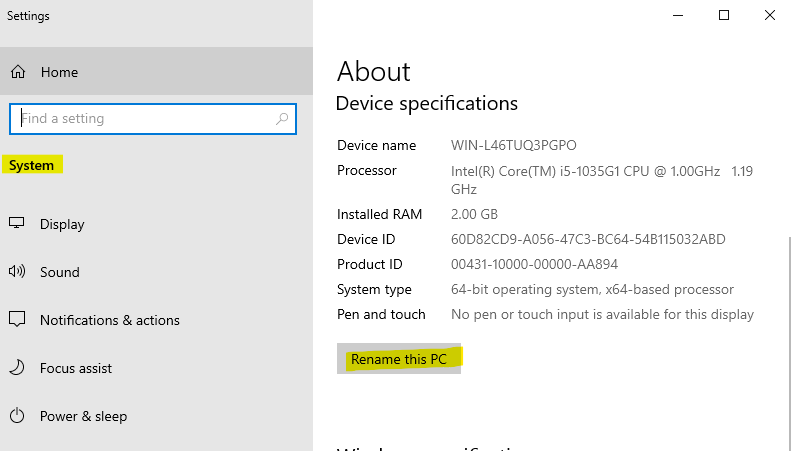
Rename the PC
Right click the start menu and head to system and Rename this PC.

Install Active Directory Domain Services
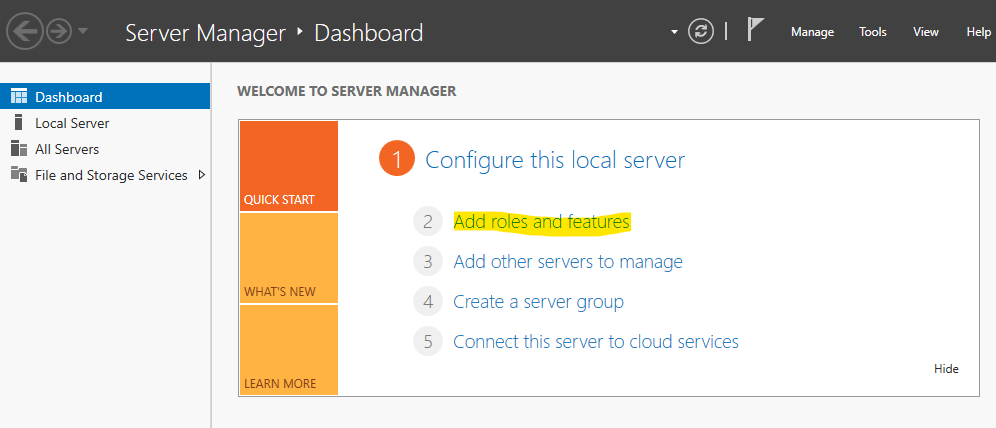
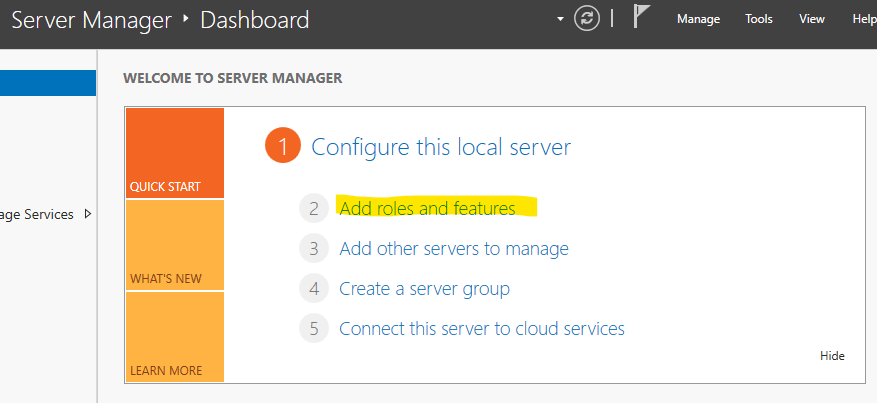
In the Server Manager we click Add roles and features.
In the installation Server Roles section we click on the Active Directory Domain Services.

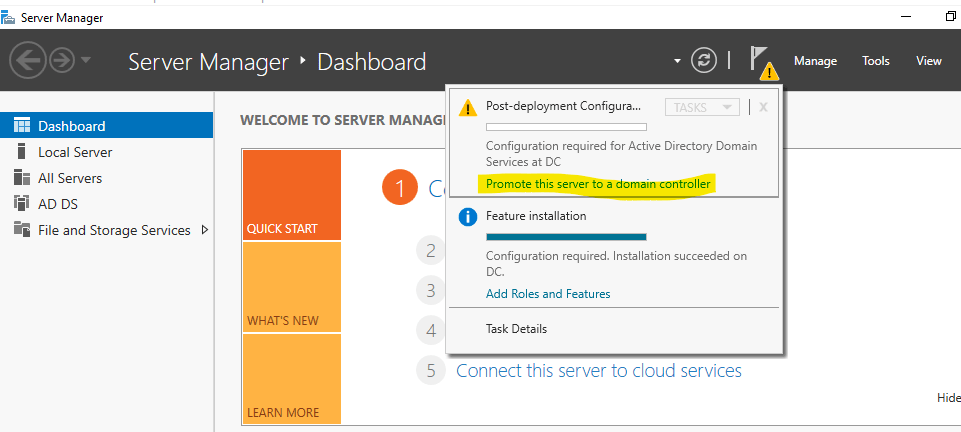
Click next until installation is complete. We will receive a flag notification on the top right of the screen.

Click on the notification and Promote this server to a domain controller.
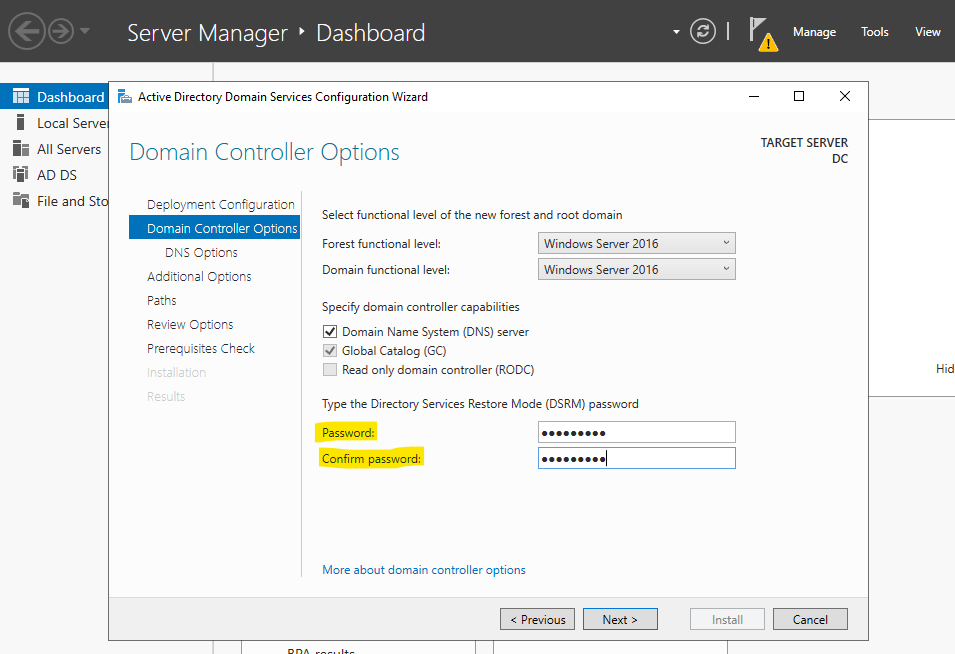
In the Deployment Configuration menu, Add a new forest and insert a root domain name.

Enter the password.
Once the entire installation is done you will be signed out of the machine.
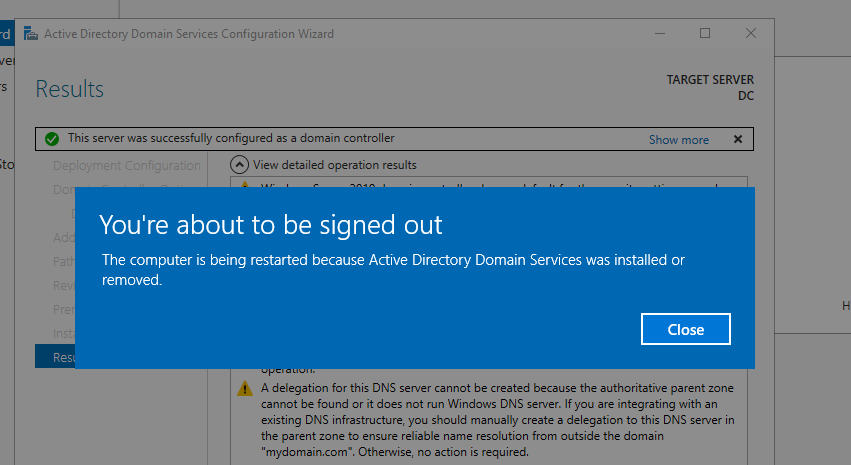
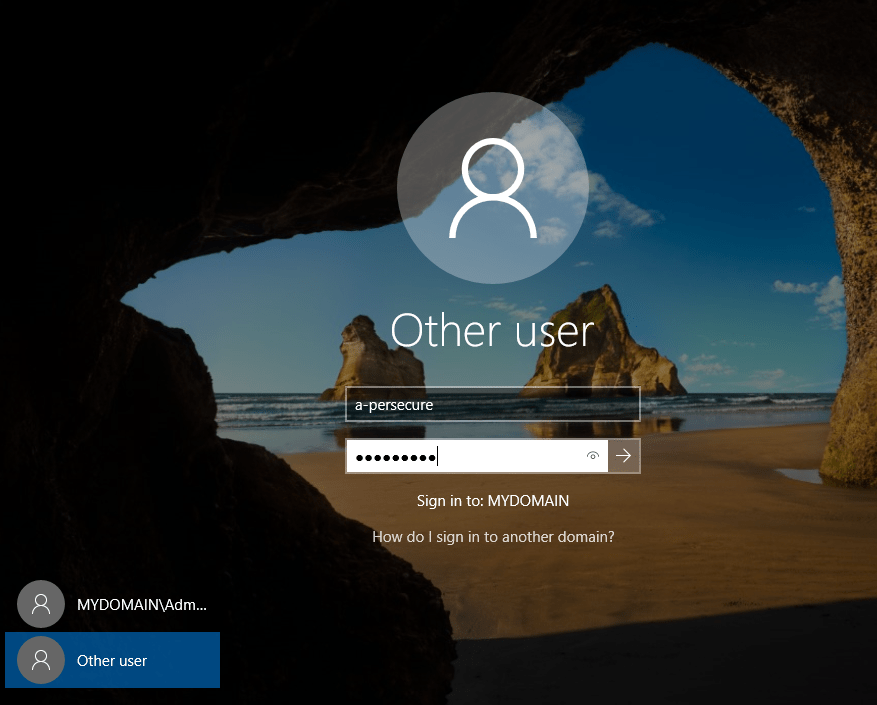
There will be a new login page with your domain.

Create Domain Admin account
Head to the Windows Administrative Tools folder and click on Active Directory Users and Computers.


Right click on mydomain.com –> New –> Organizational Unit
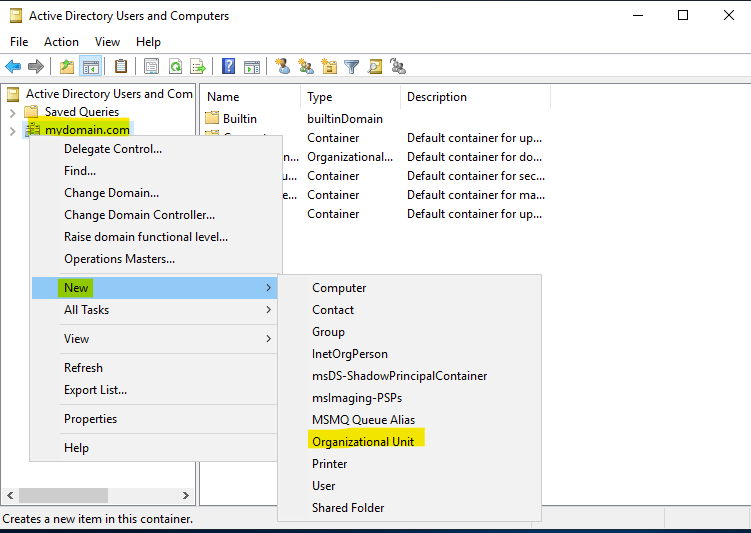
Add a new Organizational Unit.

Once added , right click on the new folder –> New –> User
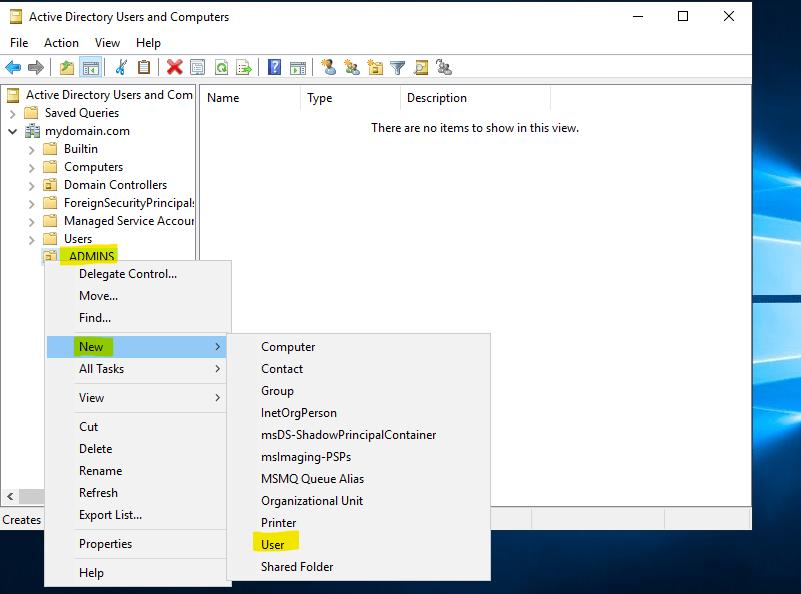
Enter the details for the new user.
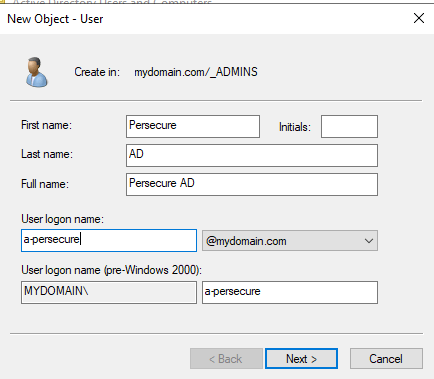
Create a password , since it is a lab account click on the Password never expires box.

Once the new user is added, right click –> Properties

Click on the Member of tab and Add
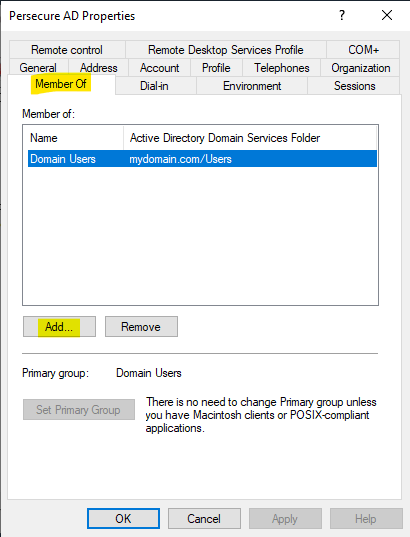
Enter Domain Admins into the object names –> Check Names –> ok

The new user will have Administrative rights.

Log out of the current user click on the Other User and enter the new account with password.
Install and configure RAS/NAT
In the Server Manager we click Add roles and features.
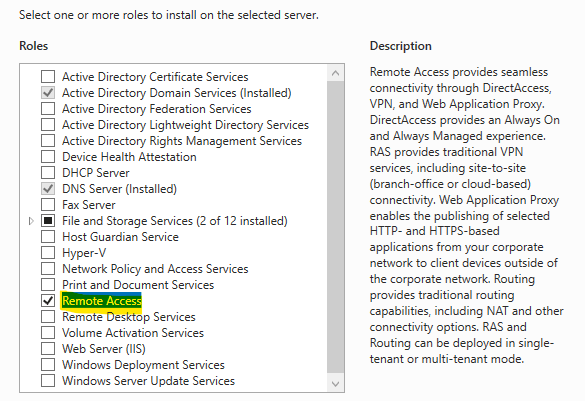
Add the Remote Access role.
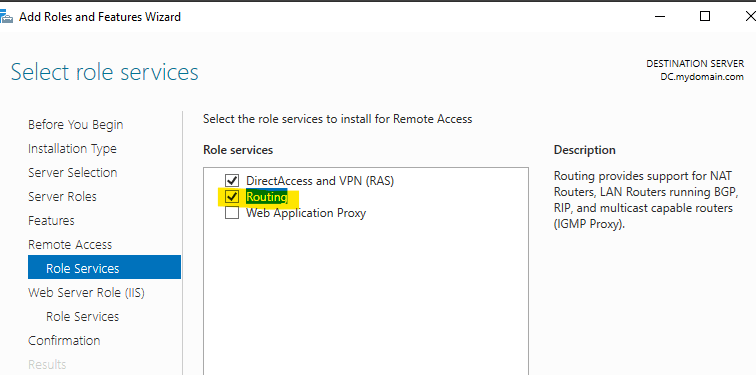
In the Role Services part of the installation add the Routing option.
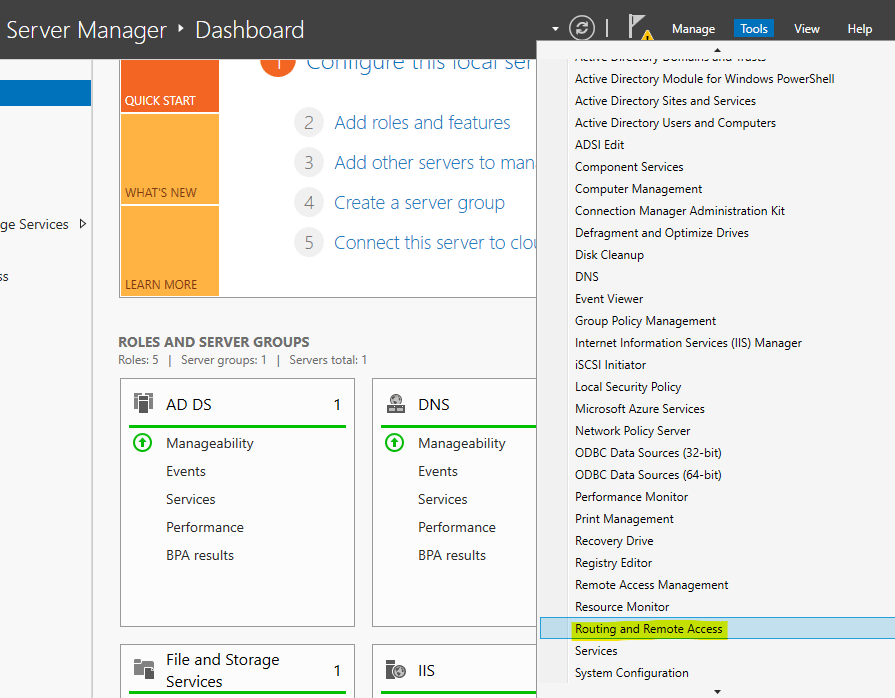
Once installed head to Tools –> Routing and Remote Access
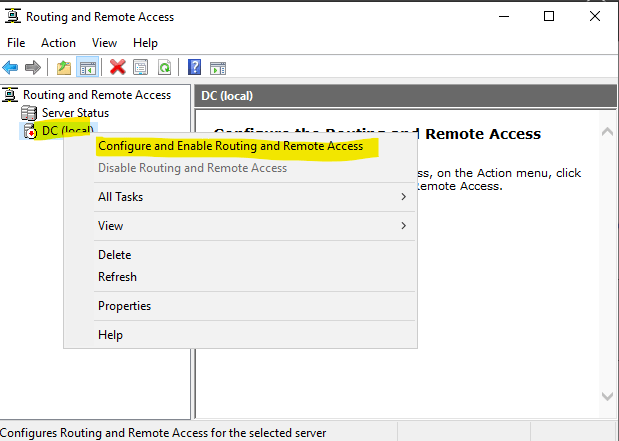
Right click on the Domain Controller –> Configure and Enable Routing and Remote Access option
Add the NAT configuration

Select the Network interface that is has the internet.

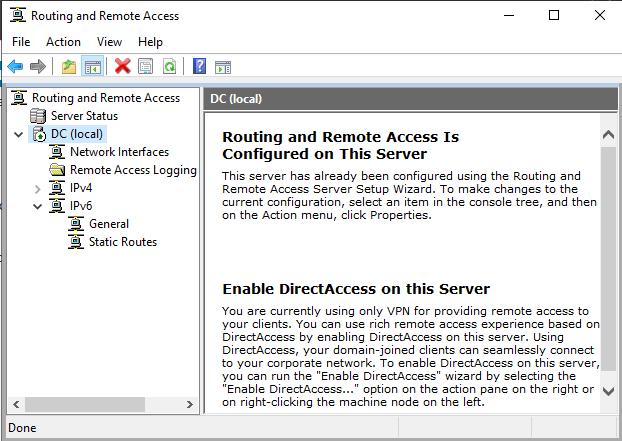
If done right, DC will be in the green.
Install and configure a DHCP

In the Server Manager we click Add roles and features.
In the installation Server Roles section we click on the DHCP Server.

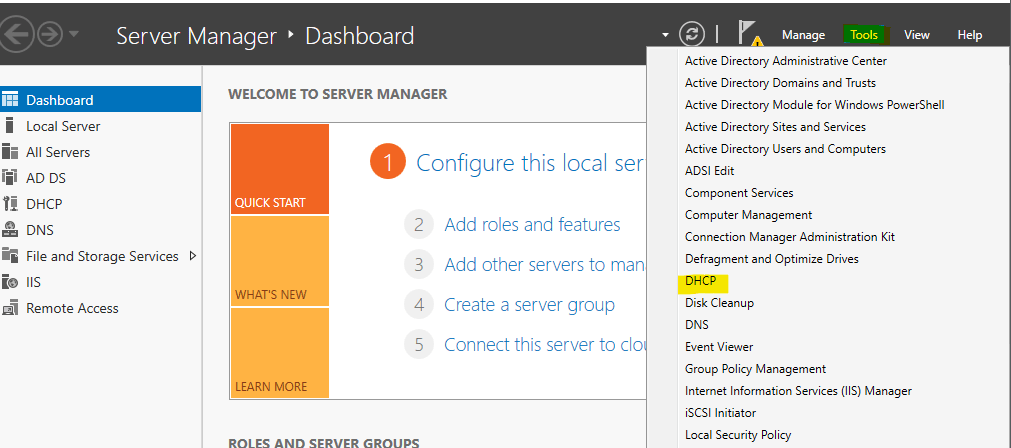
Click next for everything and once installed head to Tools –> DHCP
Right click on the DHCP server icon –> New Scope

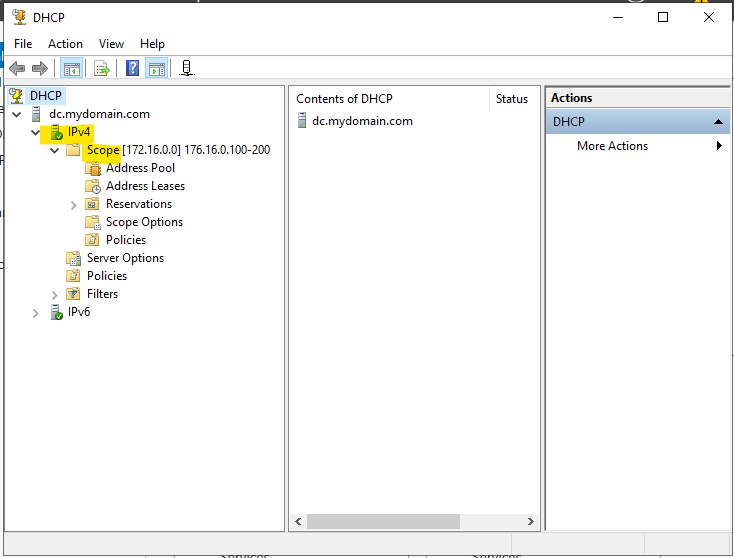
In the Scope Name section add a name , I have chose to put the DHCP IP range.

In the IP Address Range fille in the Start and End IP addresses and change the length to 24.

Add the Router IP address.

Once installation is done right click on the DHCP server and Authorize it.
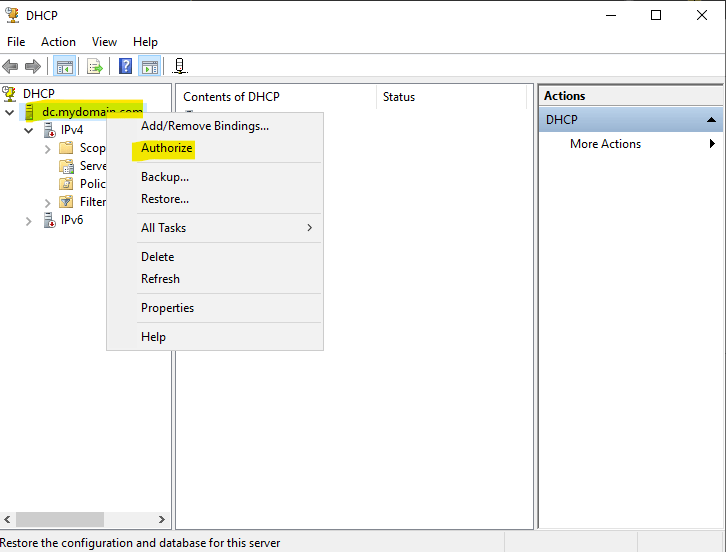
And then Refresh it to make the server in the green.

Now we need to install a Router. Head to the IPv4 –> Server Option –> Right click & Configure Options.
In the General tab add the 003 Router and add the IP address.

Restart the server

Installation of the DHCP server is done.
Download Powershell scripts from Github
In this chapter we are going to download some prebuilt powershell scripts from Github. First head to the Server Manager and Configure this local server.

In the properties section click on IE Enhanced Security Configuration and off both options. This will make the browsing on your lab less spamy from windows security.

Head to the internet browser and head to this link below:
https://github.com/Persecure/AD_PS
Download the 1_CREATE_USERS & names.txt files

There are randomly generated names list that we will be using on our lab.

PowerShell script setup and explanation
In this section we are going to run the prebuilt PowerShell script in PowerShell ISE.
Right click on Windows PowerShell ISE –> Run as administrator

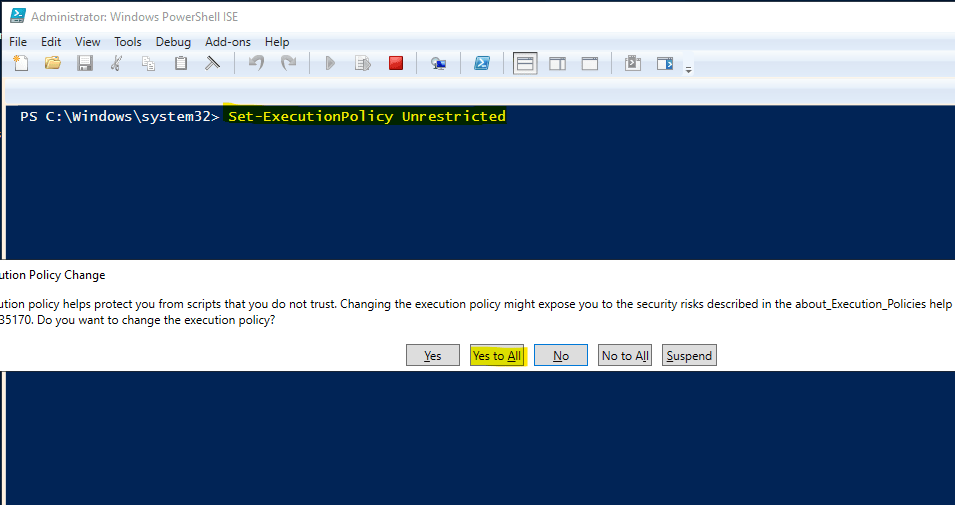
Before running the script we need to input a command to disable a safety feature. Since it is a lab.
Run Set-ExecutionPolicy Unrestricted in the command line.
Load up the powershell script in the ISE.
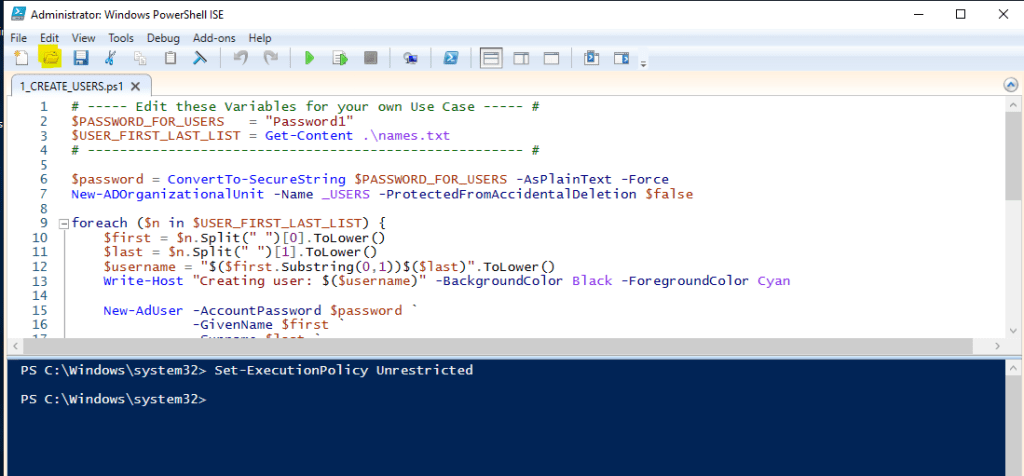
Here I’ll explain the PowerShell script in detail.
# ----- Edit these Variables for your own Use Case ----- #
$PASSWORD_FOR_USERS   = "Password1"
$USER_FIRST_LAST_LIST = Get-Content .\names.txt
# ------------------------------------------------------ #

# --- Converts plain text or encrypted strings to secure strings --- #
$password = ConvertTo-SecureString $PASSWORD_FOR_USERS -AsPlainText -Force

# --- Creates an Active Directory organizational unit --- #
New-ADOrganizationalUnit -Name _USERS -ProtectedFromAccidentalDeletion $false

# --- A loop function that takes the first alphabet in the first name and combines with the last name--- #
foreach ($n in $USER_FIRST_LAST_LIST) {
    $first = $n.Split(" ")[0].ToLower()
    $last = $n.Split(" ")[1].ToLower()
    $username = "$($first.Substring(0,1))$($last)".ToLower()
    Write-Host "Creating user: $($username)" -BackgroundColor Black -ForegroundColor Cyan

# --- Creates an Active Directory user with the details provided--- #

    New-AdUser -AccountPassword $password `
               -GivenName $first `
               -Surname $last `
               -DisplayName $username `
               -Name $username `
               -EmployeeID $username `
               -PasswordNeverExpires $true `
               -Path "ou=_USERS,$(([ADSI]`"").distinguishedName)" `
               -Enabled $true
}
Change directory to script directory
Before running the script we need to change the directory to the script directory. Insert the following command:
cd C:\Users\<YOUR USER NAME>\Desktop\AD_PS-master

Run Script
Let’s run the script by clicking on the play which is a green button on the top toolbar.
Once done we can open up Active Directory Users and Computers –> _USERS to see our newly created users.

To confirm the users we can search for our own user.

Install Windows 10
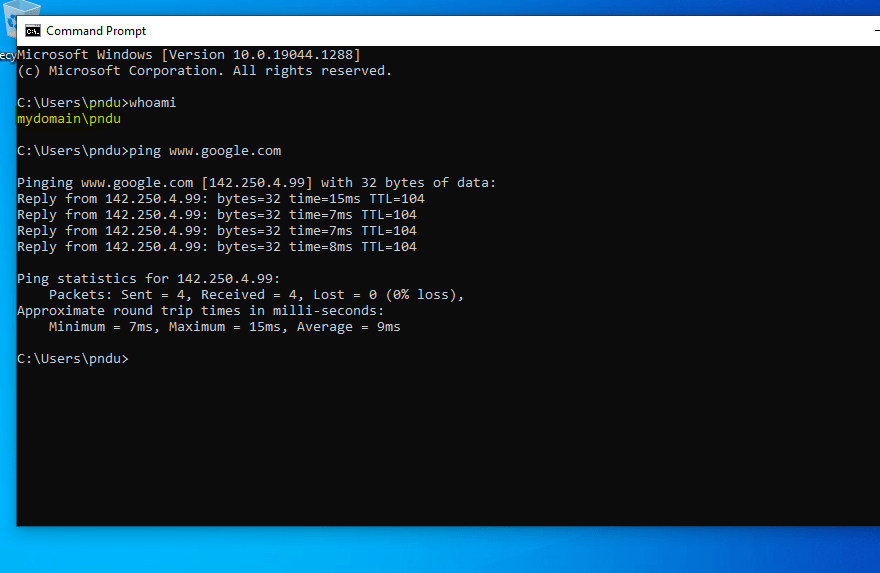
Check for ip address and ping to check for internet connectivity.
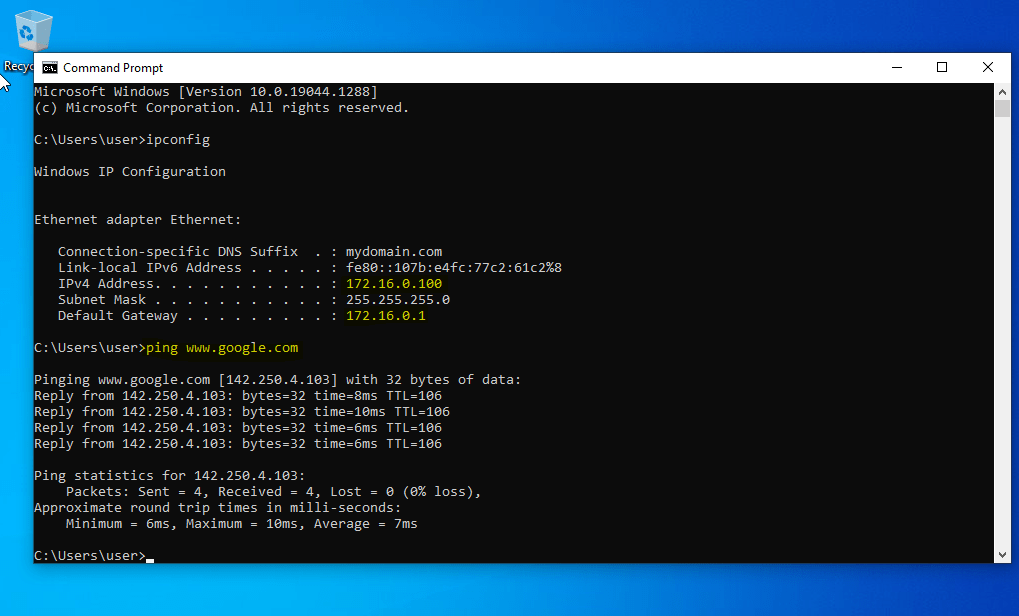
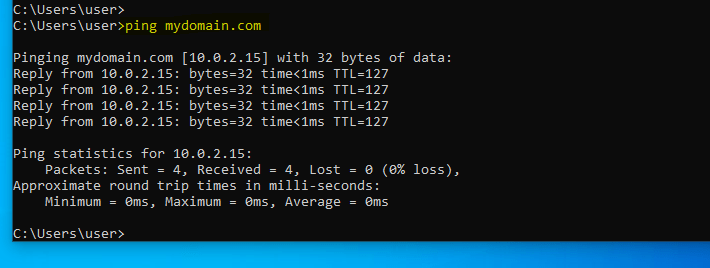
Ping the domain.
Head to System –> Rename this PC (advanced) –> Change and Insert the new Computer name and insert Domain.

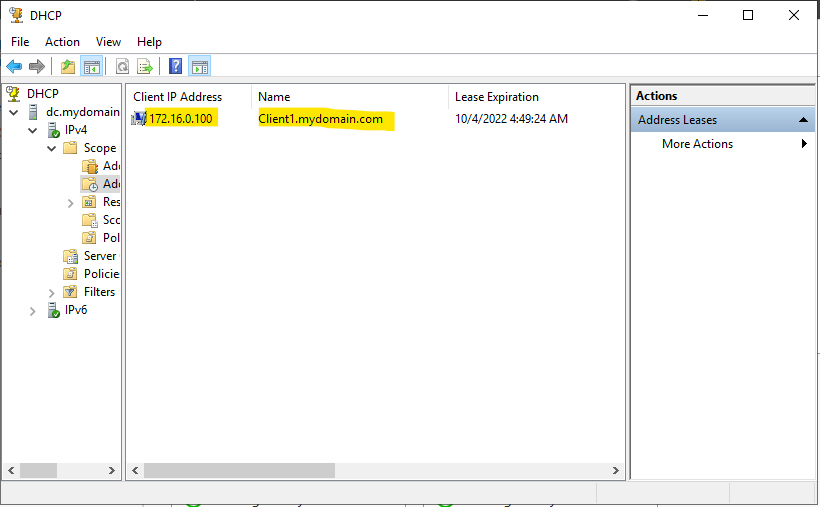
Head back to the Windows server –> DHCP –> Address Leases and we can the Client1 machine connecting to our server.
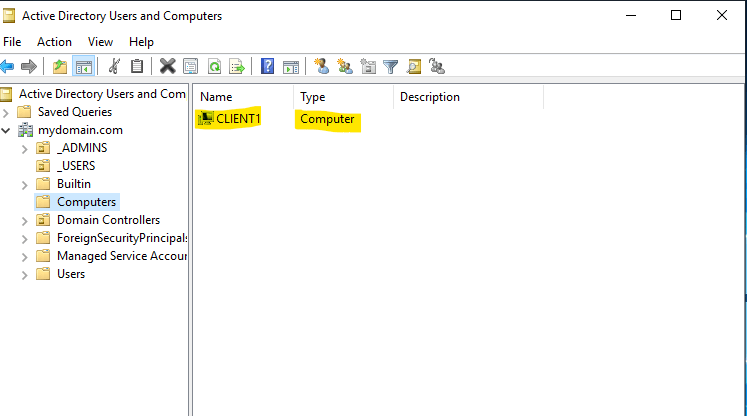
In the Active Directory Users and Computers we can see a newly added computer.
Test a new user
Head back to the Windows 10 machine and log in with any list of users that was created via PowerShell script and we have access to the user with internet connectivity.
This is the end of the tutorial
